Status pages
A status page is a hosted page that shows the live health of a set of monitors. You can keep it private for your team, or make it public so customers can check your service status without contacting support.
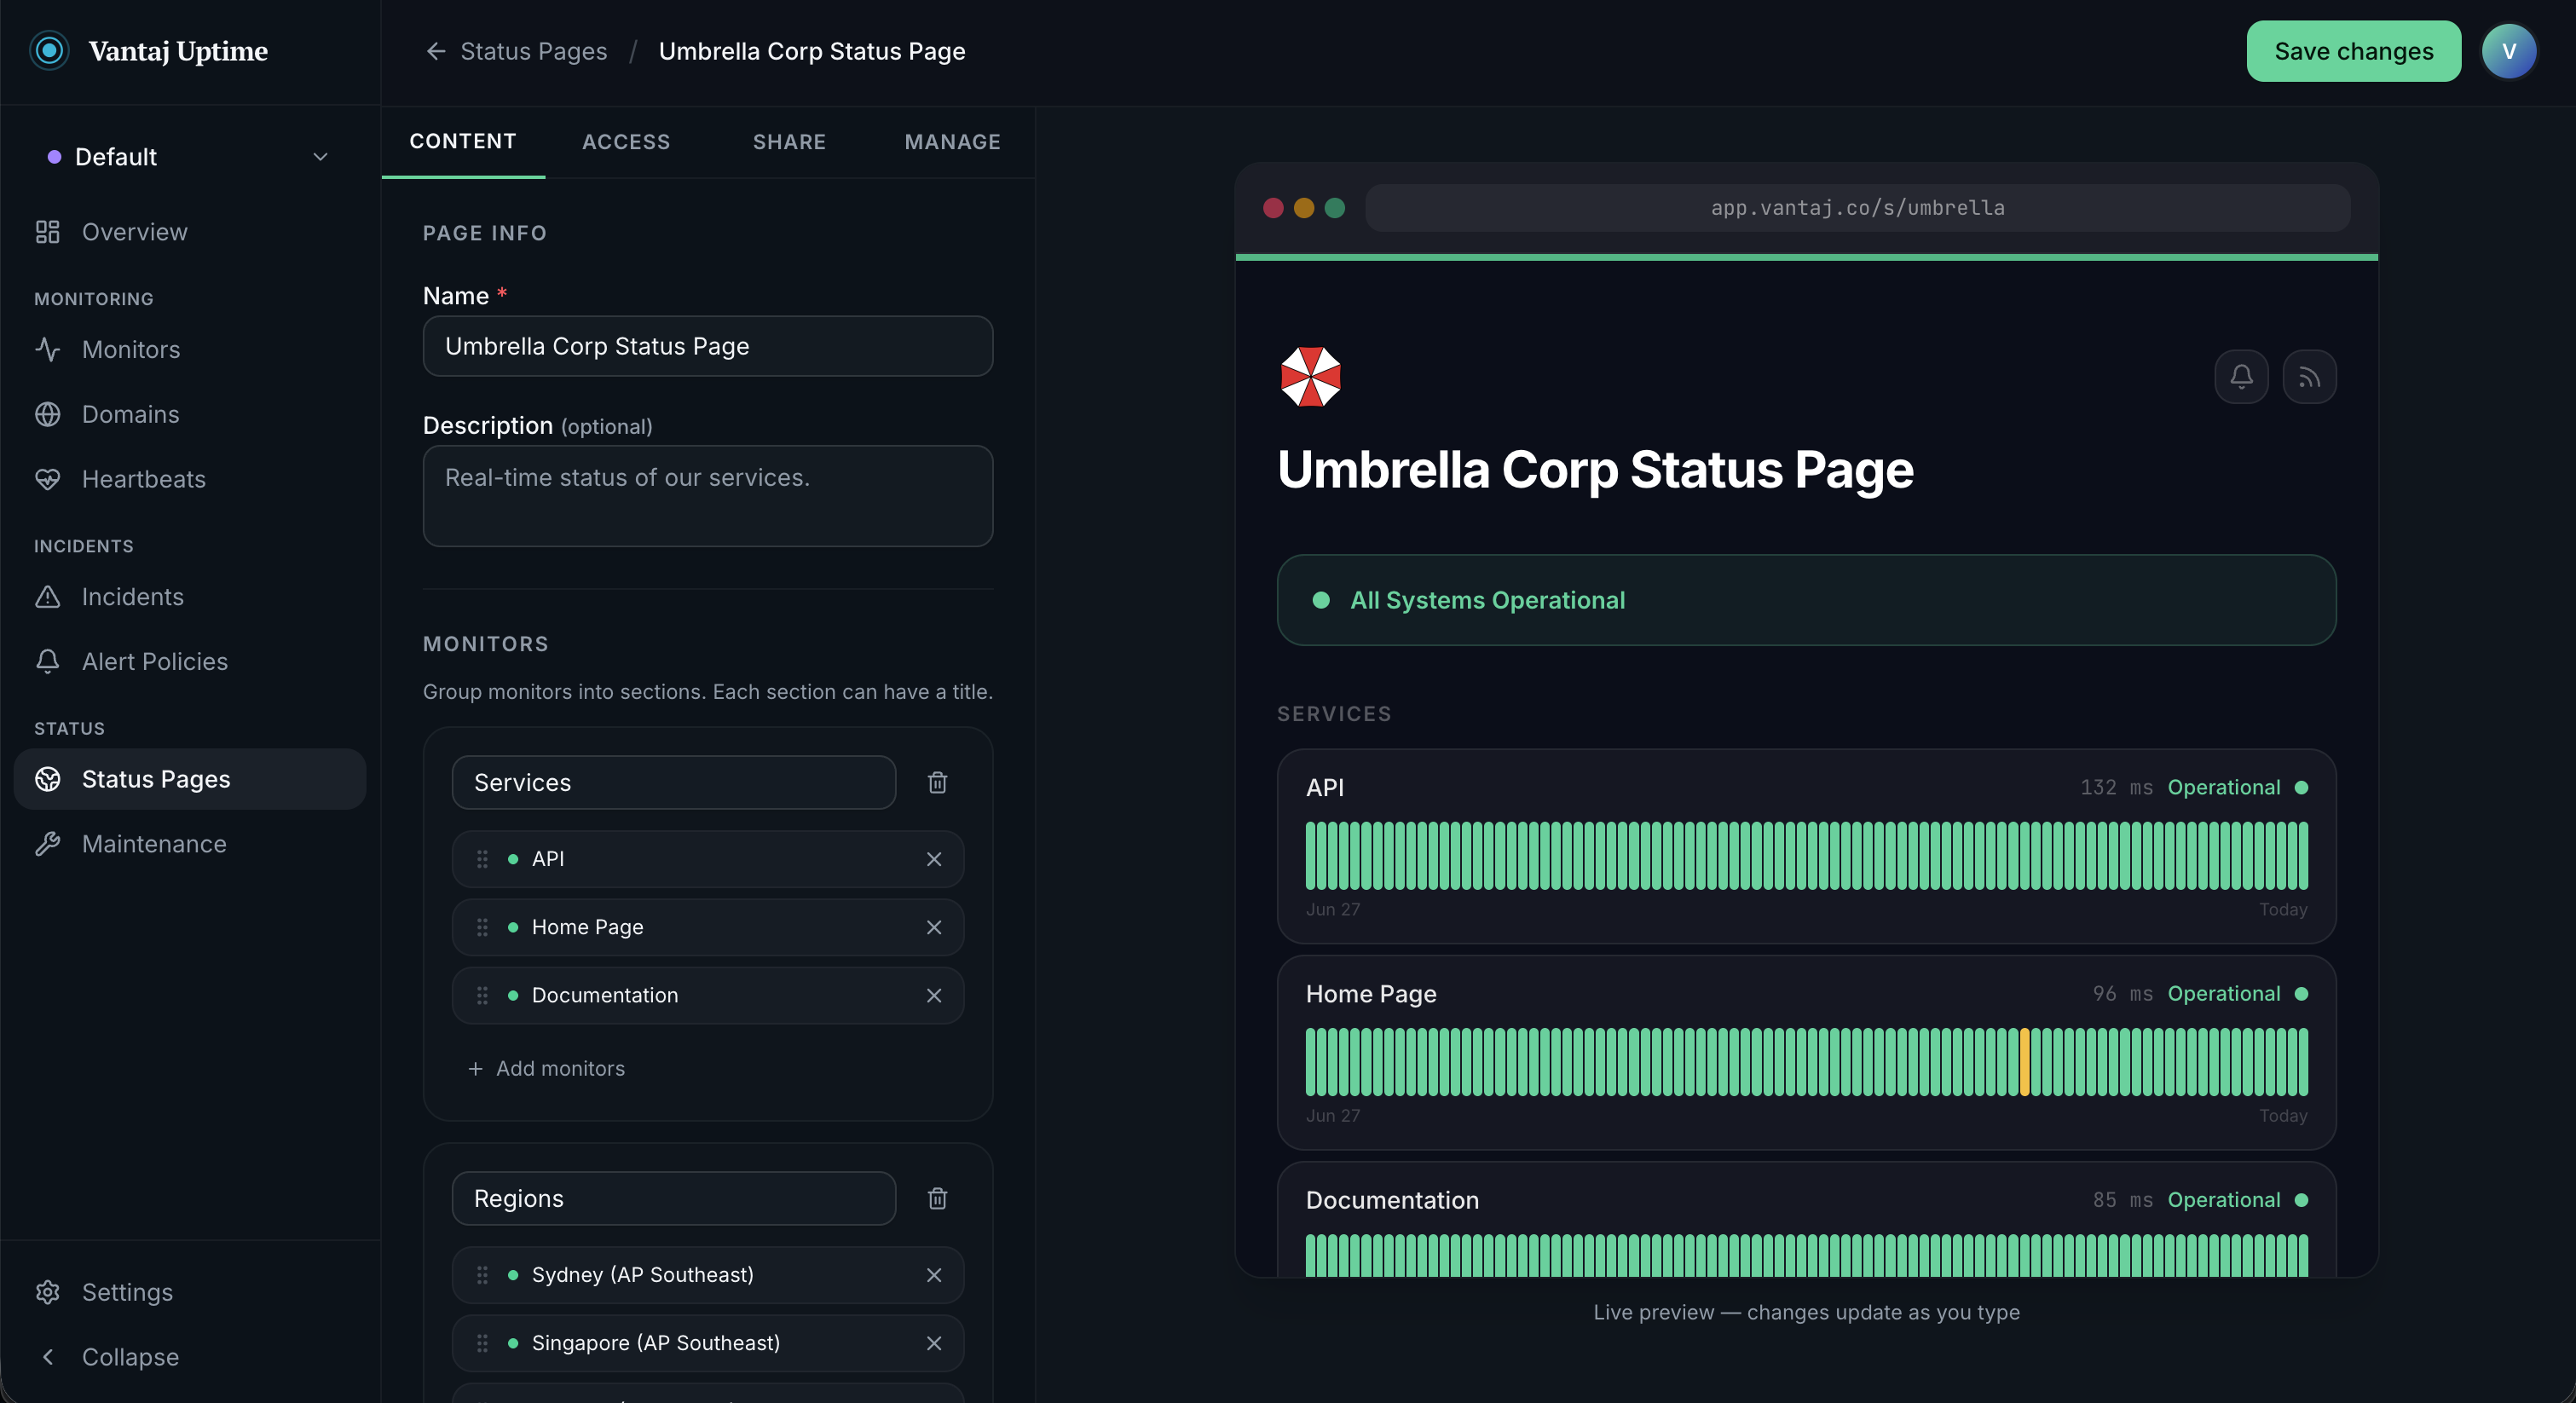
Creating a status page
Go to Status Pages in the left navigation and click New status page.
Fill in the basic details:
- Name - shown as the page heading (e.g.
ACME Status) - Description - optional subtitle shown below the name
- Accent color - the highlight color used for the status banner and interactive elements. Choose a preset or enter a custom hex value.
- Show "Powered by Vantaj" - toggle the small attribution badge at the bottom of the page
Click Create to save the page and continue configuring it.
Adding monitors
Switch to the Content tab. Monitors are organised into sections - each section can have an optional title (e.g. Production, Infra, Third-party services).
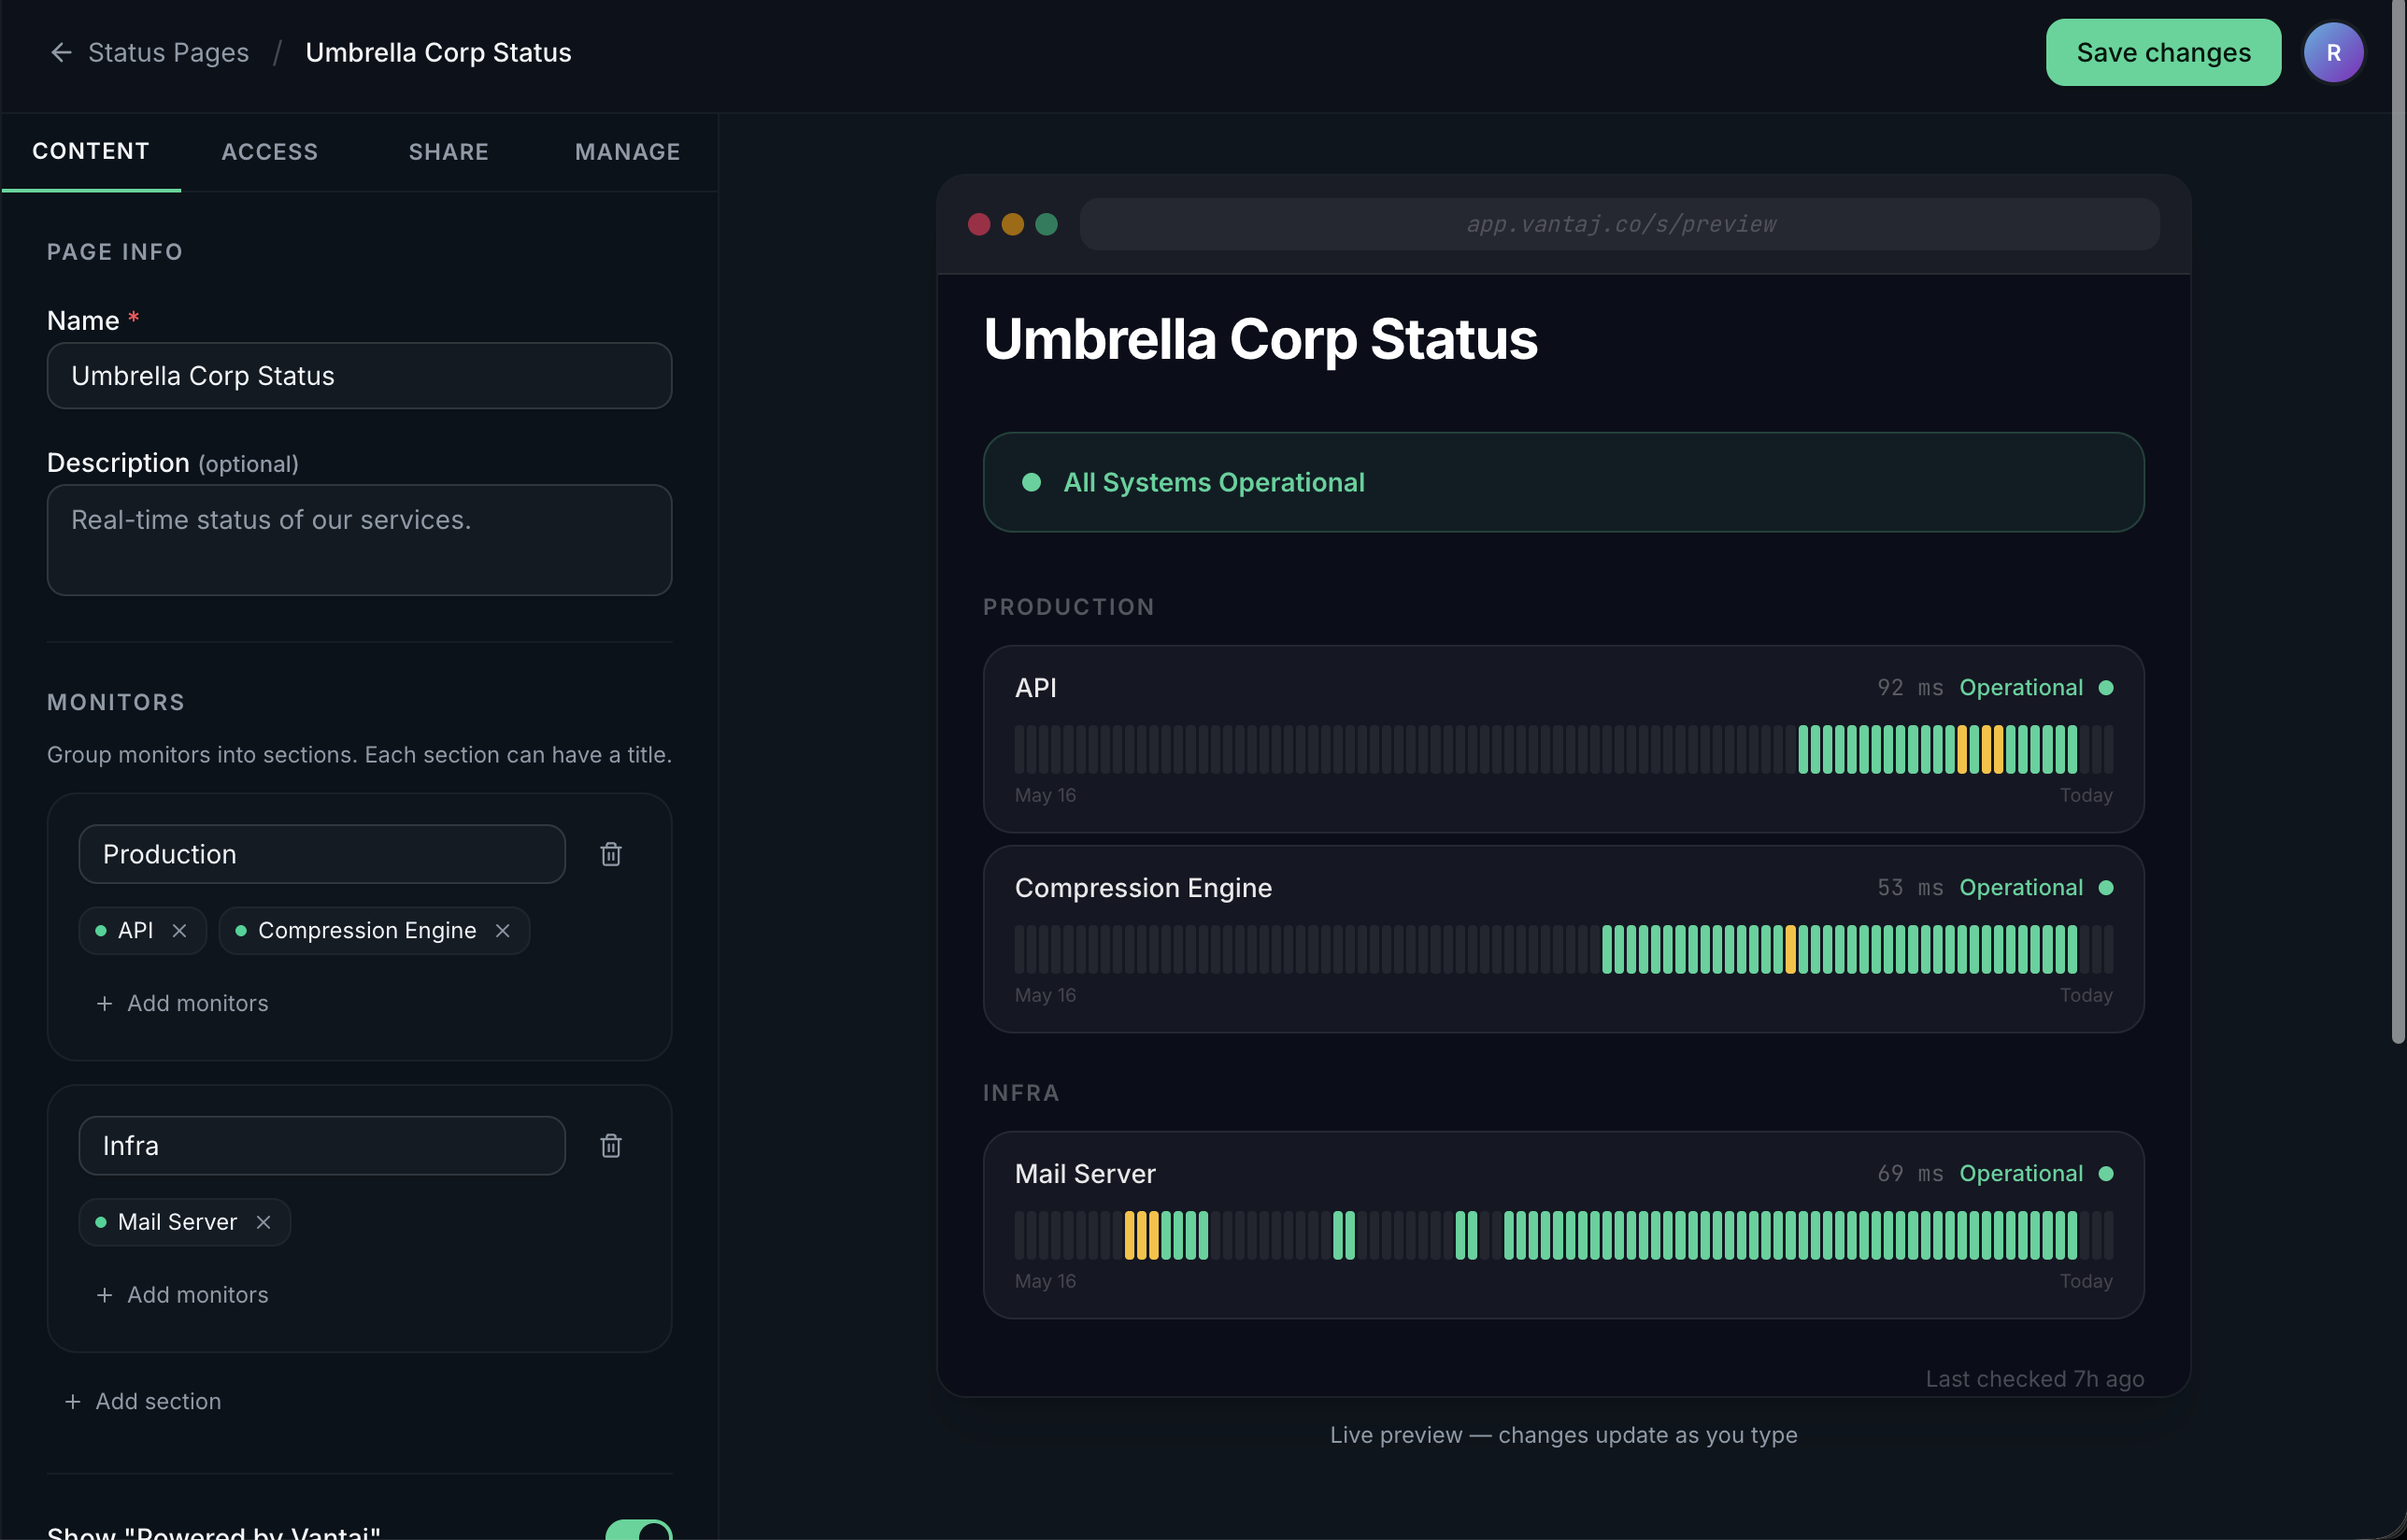
- Click Add monitors inside a section to pick monitors from your workspace
- Assigned monitors are listed one per line, showing their live status; click the × to remove one
- Drag the grip handle on the left of a monitor row to reorder it within the section - the order you set is the order visitors see on the public page
- Click Add section to create another group
- Sections with no title are displayed without a header
The right side of the editor shows a live browser preview that updates in real time as you type - no need to save first.
Monitors from any project in your workspace can be added to a status page.
Branding
In the Content tab, under Appearance, you can upload a logo and favicon so the page looks like it belongs to your product rather than a generic Vantaj page.
- Logo - PNG, JPEG, SVG, or WebP, up to 1 MB. Shown above the page title on the public and private views. Click Replace or Remove to change it later.
- Favicon - PNG, ICO, SVG, or WebP, up to 1 MB. Shown in the browser tab when someone visits the page.
- Accent color - the same highlight color described above, configured right below the logo and favicon.
Both images are stored per status page, so different pages in your workspace can use different branding.
Visibility
Switch to the Access tab after creating the page.
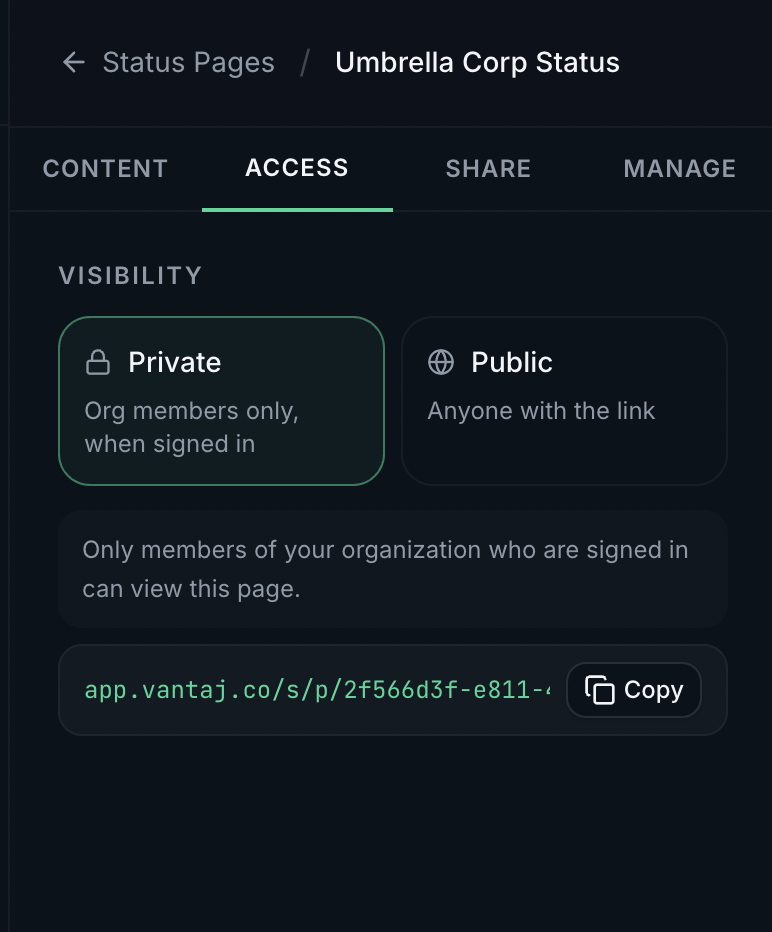
| Setting | Who can see the page |
|---|---|
| Private | Only signed-in members of your organisation |
| Public | Anyone with the link - no login required |
Private pages
Private pages are accessible only to signed-in org members. A private link (e.g. app.vantaj.co/s/p/…) is shown so you can share it internally.
Publishing a public page
- Set visibility to Public
- Enter a slug - the unique identifier that appears in the URL:
app.vantaj.co/s/your-slug - Click Save changes - the page is immediately live
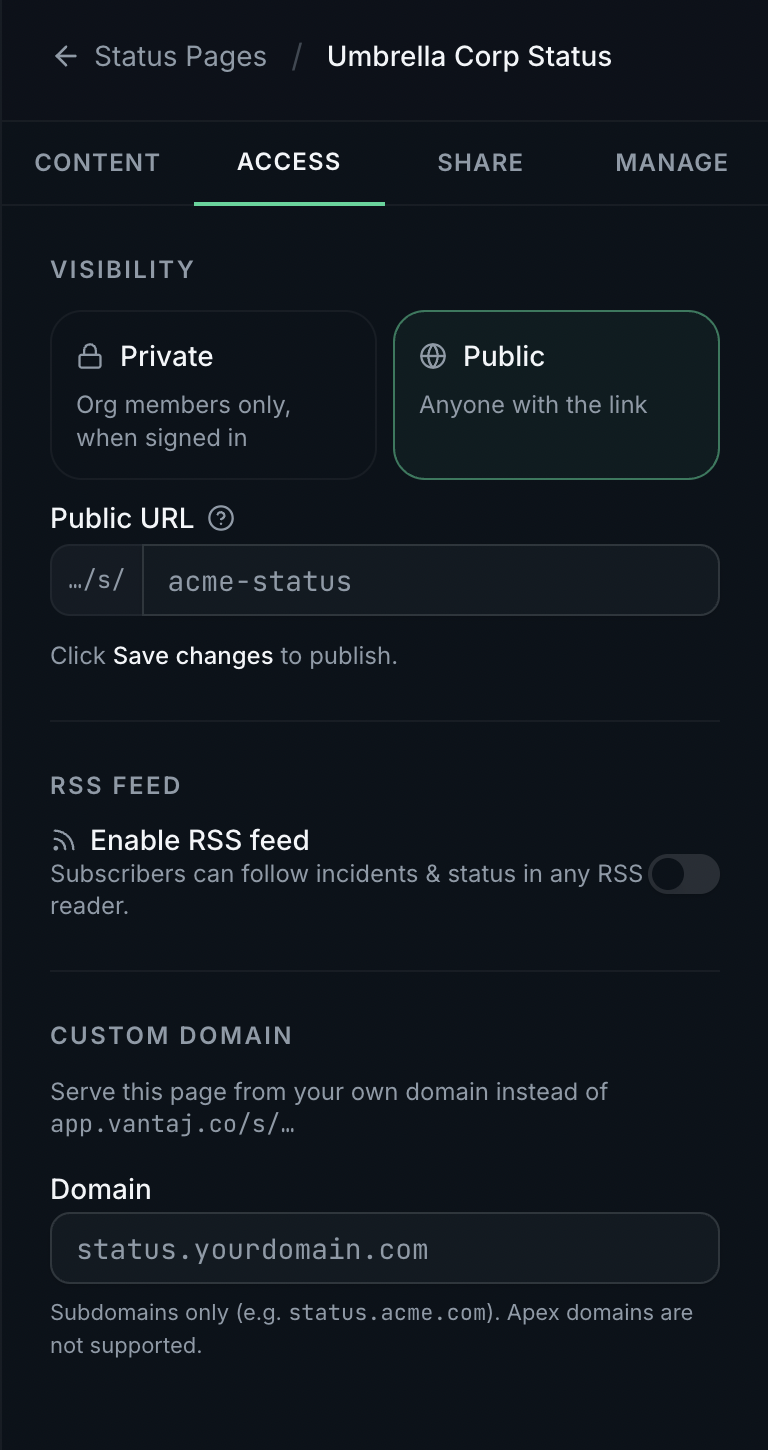
The slug must be lowercase letters, numbers, and hyphens, between 3 and 50 characters.
Unpublishing
Click Unpublish (shown next to the Published badge) to instantly make the page private again. The public URL stops working immediately. Any configured custom domain shows a "private page" message to visitors.
Search engine visibility
By default, public status pages can be indexed by Google and other search engines - useful if you want customers to find your status page by searching. If you'd rather keep the page reachable only by direct link, enable Hide from search engines in the Access tab (shown once the page is public).
This adds a noindex tag to the page, which tells search engines not to list it in search results. Anyone with the link can still open the page normally - this setting only affects search visibility, not access.
RSS feed
Enable the RSS Feed toggle in the Access tab to give subscribers a live feed of incidents and monitor status changes. The feed URL is:
https://app.vantaj.co/api/rss/your-slug
Any RSS reader (Feedly, NetNewsWire, etc.) can subscribe to this URL. The feed updates within 60 seconds of a status change.
Email subscriptions
Enable the Email subscriptions toggle in the Access tab to let visitors get notified by email when you open or resolve an incident on the page.
Once enabled, a bell button appears in the page header. Visitors enter their email and receive a confirmation message; after confirming, they're notified on incident updates. They can unsubscribe at any time from a link in those emails. Subscriptions are available on public pages.
Badges and embeds
Switch to the Share tab to get a live status badge for your README, wiki, or any webpage, as well as an embeddable widget.
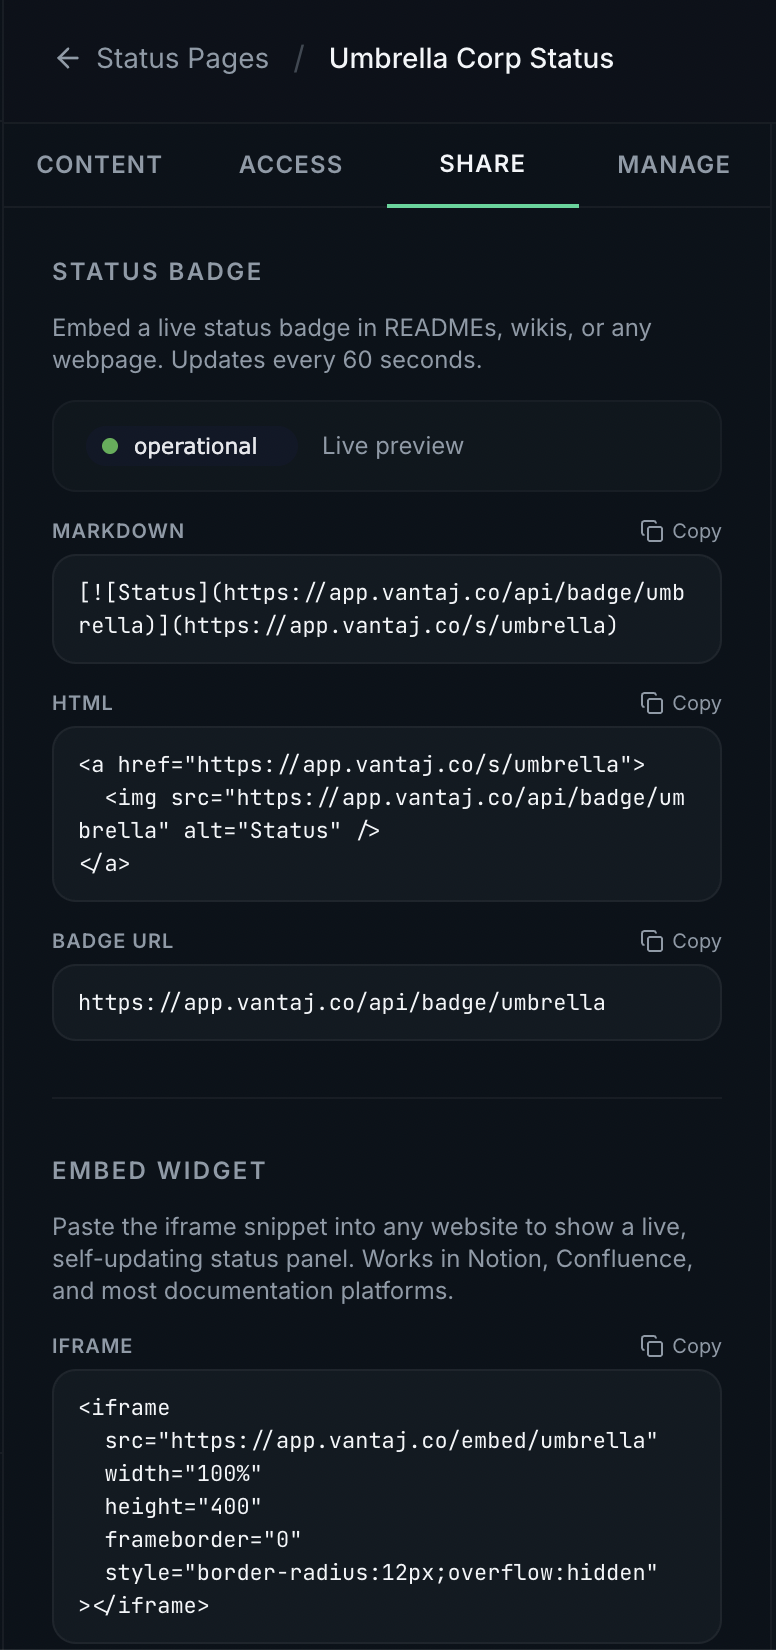
See Badges & Embeds for full details on all options.
Incidents
Use the Incidents feature to communicate planned maintenance or outages directly on your status page. Click the Incidents button next to the Edit button on the Status Pages list.
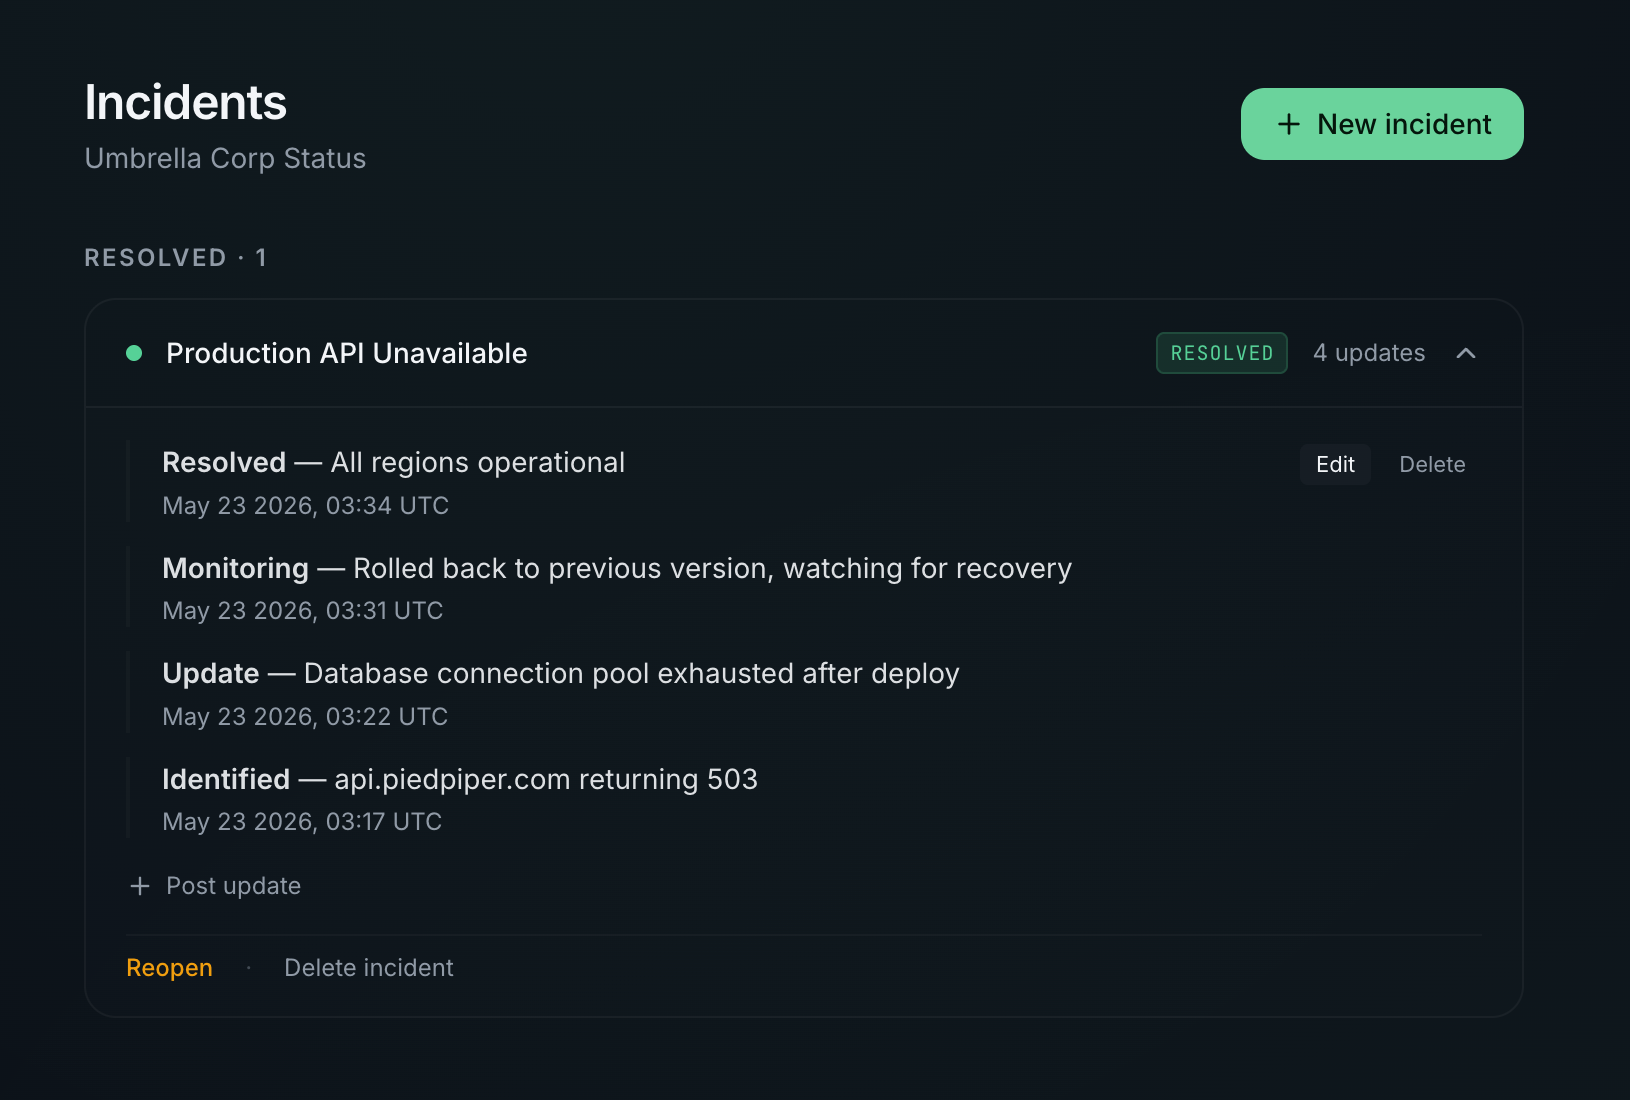
Creating an incident
Click + New incident and fill in:
- Title - a short description shown prominently on the status page (e.g.
Production API Unavailable) - Severity -
Minor,Major, orCritical(see below) - Verb - the type of update (
Identified,Monitoring,Update,Resolved, etc.) - Timestamp - the exact UTC date and time of this first update
- Message - details about what happened and what's being done
Severity levels
Every incident has a severity that controls its color on both the internal list and the public status page:
| Severity | Color | Use it for |
|---|---|---|
| Minor | Yellow | Small, low-impact issues - a slow endpoint, a cosmetic bug |
| Major | Amber | Partial outage or degraded service affecting some users |
| Critical | Red | Full outage or an issue affecting all users |
You can change an incident's severity at any time by expanding its card and selecting a different level - the change is reflected immediately on the public page.
Posting updates
Expand any incident card and click + Post update to add timeline entries as the situation evolves. Choose a verb and timestamp for each update.
When you post a Resolved update, the incident is automatically marked as resolved - no separate action needed.
How incidents appear on the status page
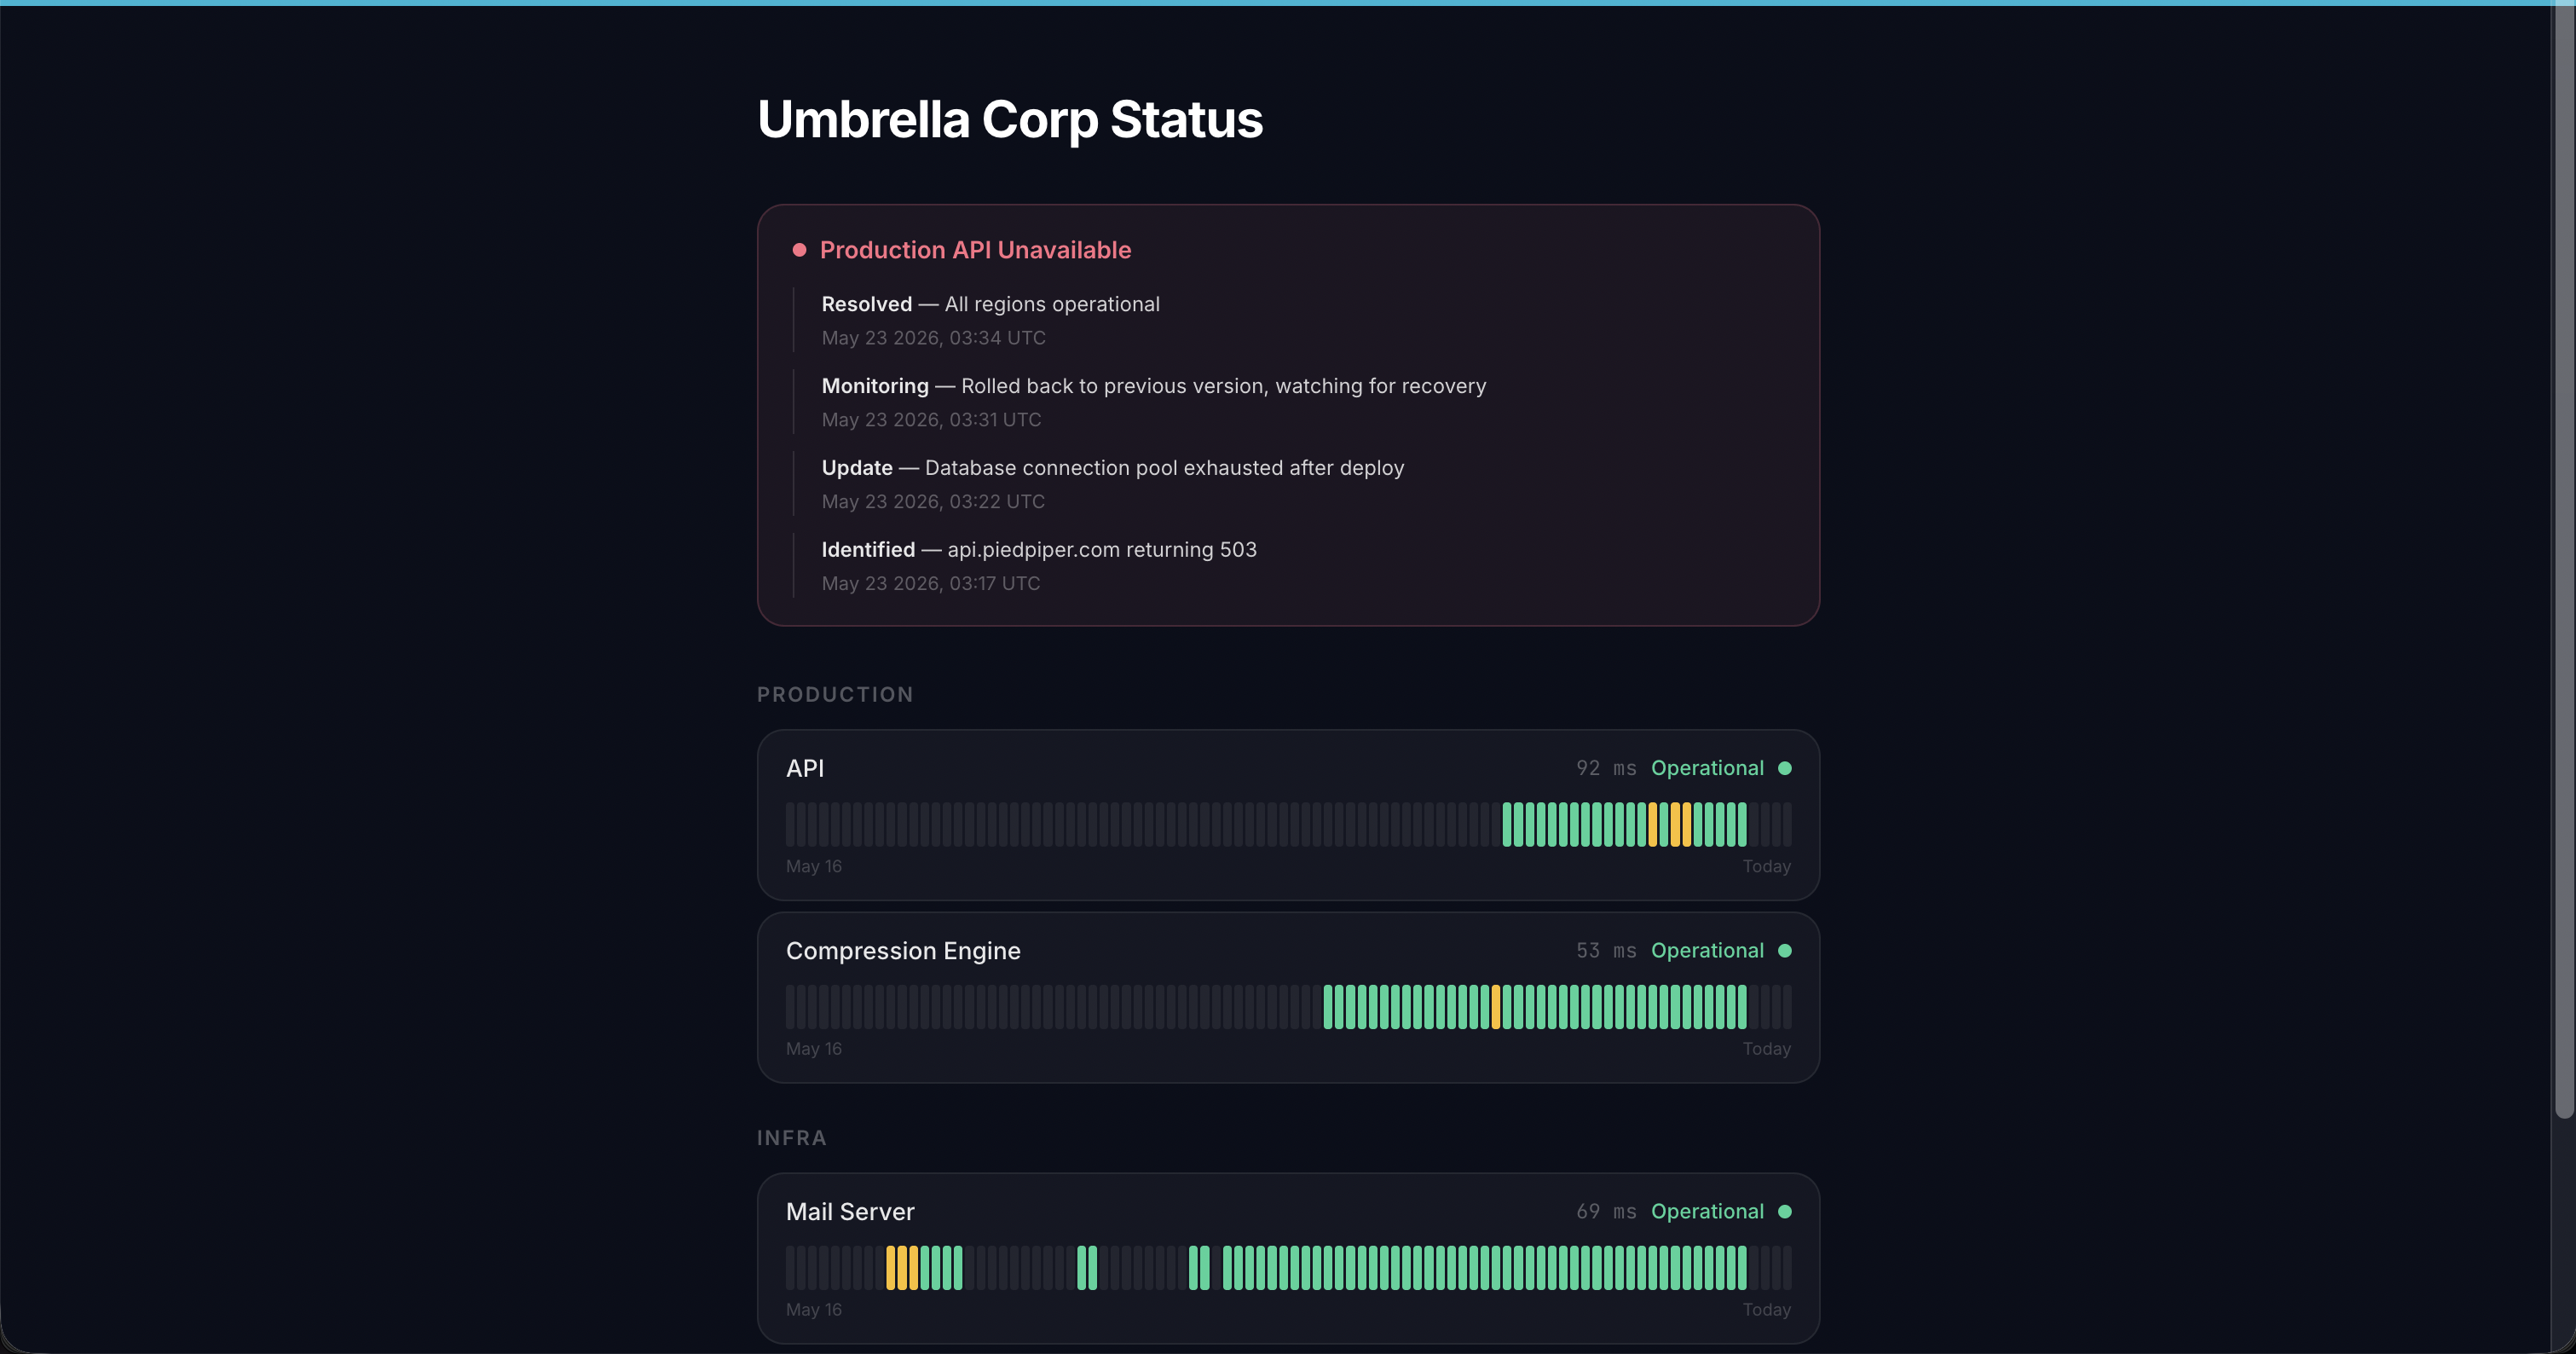
Active (ongoing) incidents are displayed prominently at the top of the status page, above the monitor sections, tinted by their severity color. The "All Systems Operational" banner is hidden while any incident is active.
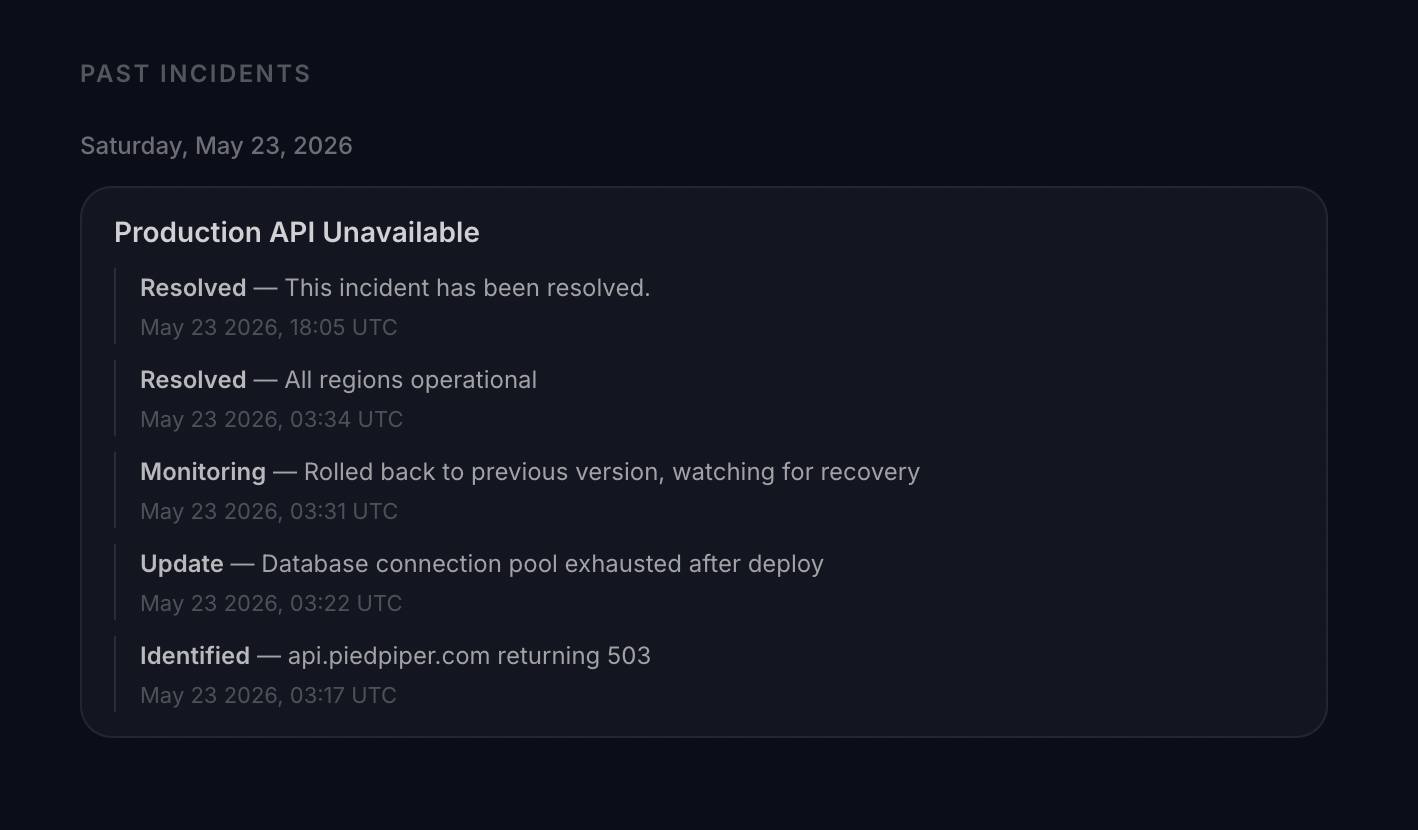
Resolved incidents from the last 30 days are shown in the Past Incidents section at the bottom, grouped by date.
Re-opening and deleting incidents
- Reopen - moves a resolved incident back to ongoing
- Delete incident - permanently removes the incident and all its updates
Resolved incidents are automatically purged after 30 days.
Scheduled maintenance
Announce planned maintenance directly on your status page - visitors see it coming, watch it happen, and can find it afterward, without you creating a manual incident.
Click the Maintenance button next to Incidents on the Status Pages list to open the maintenance page for that status page.
Linking a maintenance window
You have two options:
- Link an existing window - check the box next to any maintenance window already created under Maintenance to show it on this status page
- Create a new window - click New window to schedule one from here. It uses the same start/end time, timezone, and monitor selection as the Maintenance page, and the monitors already on this status page are preselected. The window it creates also appears under Maintenance like any other.
A single maintenance window can be linked to more than one status page.
How it appears on the public page
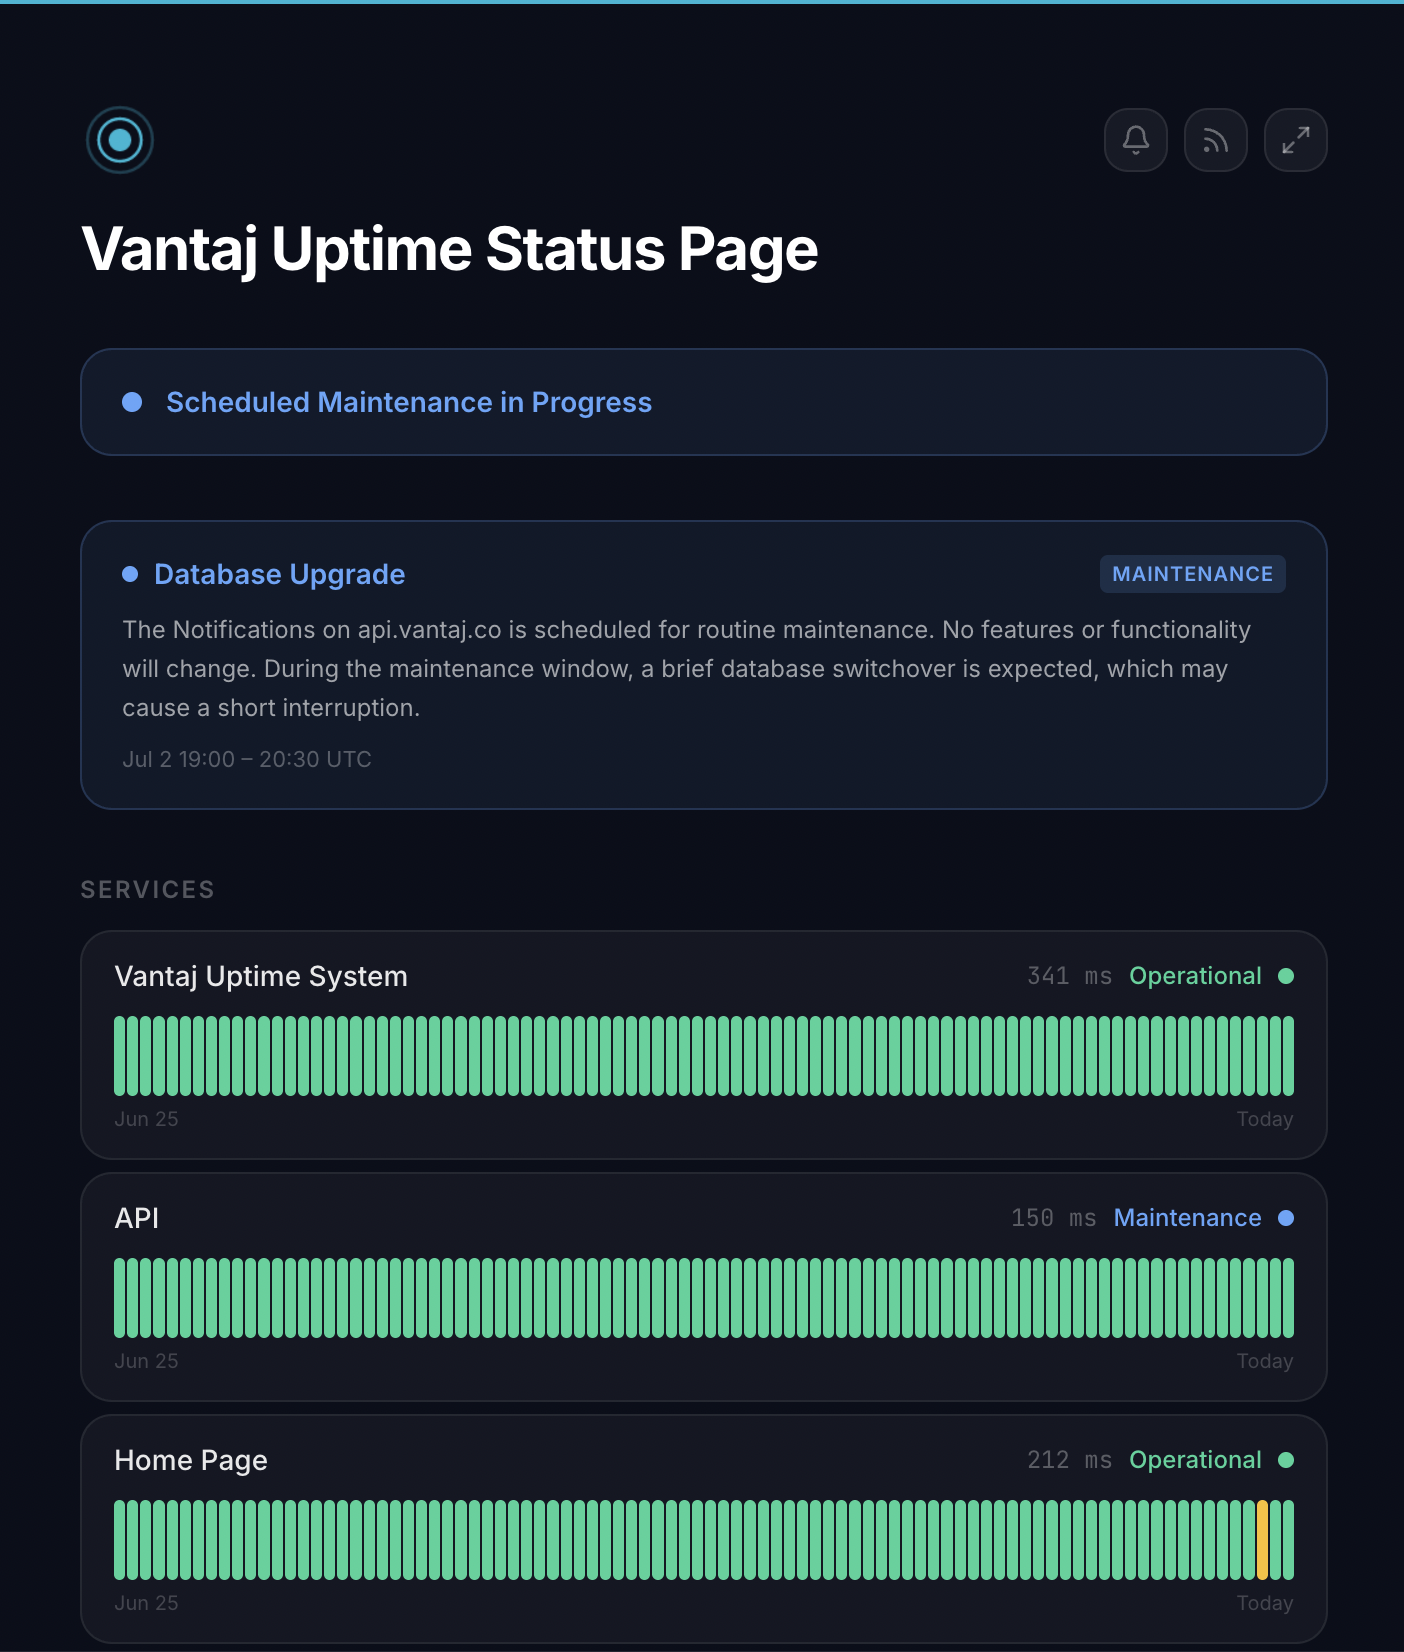
- Upcoming - a dashed blue box announces the window ahead of time, with its title, description, and scheduled time range
- Active - a solid blue banner replaces the box while the window is running, and every monitor it covers shows a blue Maintenance state instead of its real status. The overall page banner reads "Scheduled Maintenance in Progress" instead of showing a disruption - unless an unrelated monitor is also down
- Completed - once the window ends, it moves into Past Incidents alongside resolved incidents, so visitors can still see it happened
Start and end are automatic - there's nothing to manually flip. If email subscriptions are enabled on the page, confirmed subscribers get an email when the maintenance window starts.
Custom domain
You can serve your status page from your own subdomain (e.g. status.yourcompany.com) instead of the default Vantaj URL. See Custom Domains for setup instructions.
Deleting a status page
Go to the Manage tab and click Delete Status Page. You will be asked to confirm. Deletion is permanent - the public URL stops working immediately and cannot be recovered.